The
Bankslab Stimulus AntiAliasing Guide for OpenGL
As a general rule, all of our stimuli here in the Lab needs to be
antialiased. There are a few different ways of doing this in
OpenGL depending on what your stimulus is and how much antialiasing
you need. As a general rule, the higher the quality, the longer
it takes to render the image. The complexity of most of our
scenes is low enough that we can usually use the highest quality
settings without any noticable delay ( < 30ms ). How too
obtain the optimal Antialiasing depends on what you are drawing.
Basic summary:
- Drawing points or lines, Random Dot Stereograms or Voronoi
Patches:
- Use OpenGL's Point Smooth and Line Smooth features.
- Drawing 3D objects or surfaces, you should
- Use the Multisample AntiAliasing (MSAA) provided by the OpenGL
driver.
* Never use OpenGL's Polygon Smoothing feature! To do this
properly you must depth sort the polygons yourself, draw them in
front-to-back order with the correct blending settings. See the
Red Book for more information.
If the topic of Antialiasing is new to you, Wikipedia has an
introduction:
http://en.wikipedia.org/wiki/Anti-aliasing
The Details:
Drawing
points or lines:
Whan drawing points or lines, you'll get the best antialiasing by using
the smoothing provided by OpenGL. This is what is done on the
Haploscope in the bvlEnableAntialiasing function. You enable
smoothing, set the glHint to be the nicest possible (as opposed to the
fastest) and then enable blending.
The OpenGL code enable smoothing:
glEnable(GL_LINE_SMOOTH);
glHint(GL_LINE_SMOOTH_HINT,
GL_NICEST);
glEnable(GL_POINT_SMOOTH);
glHint(GL_POINT_SMOOTH_HINT, GL_NICEST);
glEnable(GL_BLEND);
glBlendFunc(GL_SRC_ALPHA,
GL_ONE_MINUS_SRC_ALPHA);
NOTE: If antialiasing is enabled in the display settings (see
Drawing 3D shapes or surfaces below), it will actually reduce quality
of the antialiasing achieved through the smoothing. There's two
options for solving this:
- Turn off antialiasing in the display settings by setting it to
"Application controlled" (in the NVidia drivers)
- Disable it in your code by turning off Multisampling:
- glDisable(GL_MULTISAMPLE);
Example Code, based on the Antialiased Lines code from the RedBook
(aargb.c):
Example Screenshots of OpenGL
Lines (click on images for larger version):
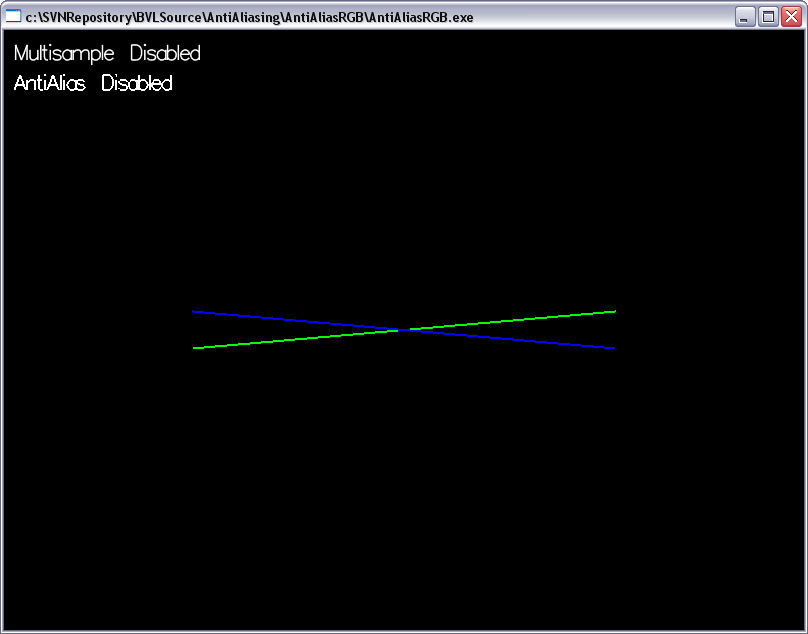
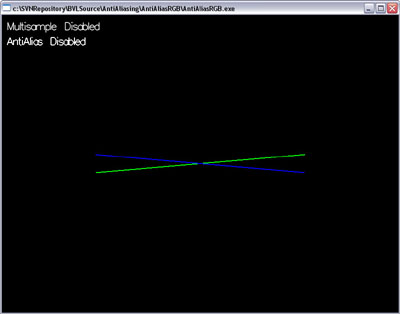
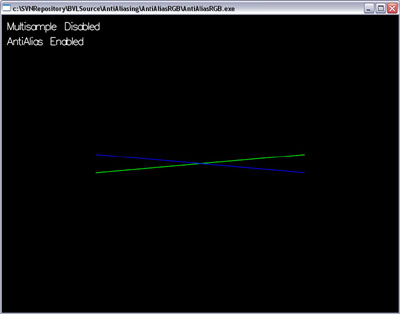
Lines with No Antialiasing, No Multisampling:
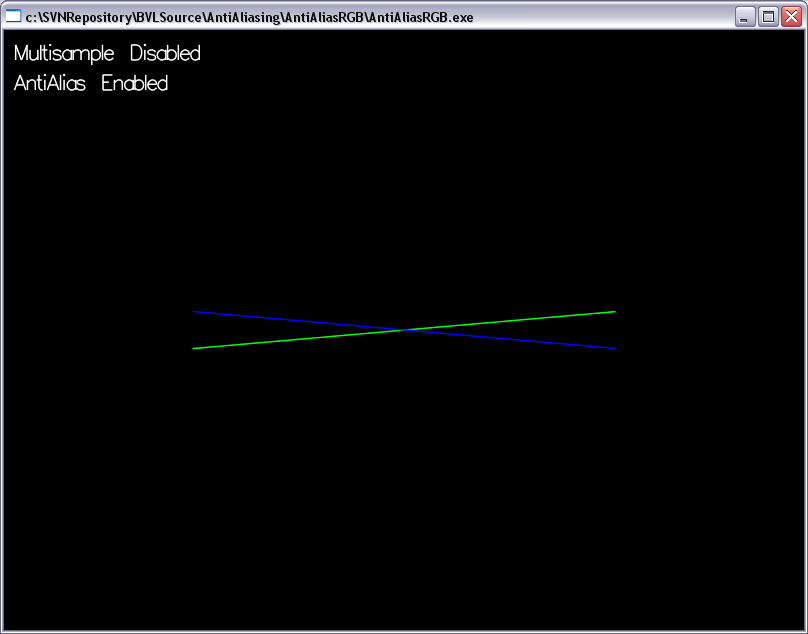
Lines with Antialiasing, No Multisampling (what you want):
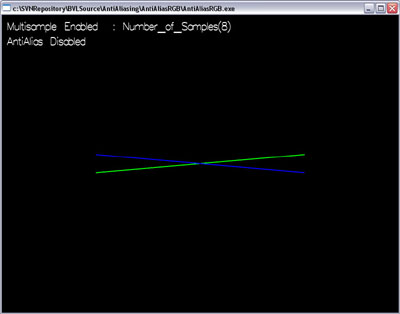
Lines with No Antialiasing but with Multisampling:
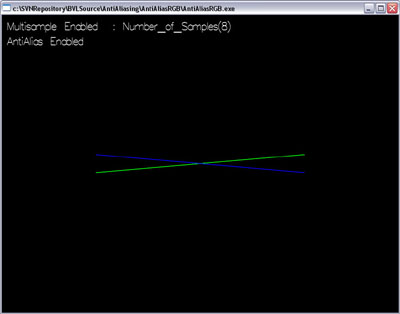
Lines with Antialiasing and Multisampling. Notice the
Multisampling reduces the quality of the Antialiasing.
Drawing 3D shapes or surfaces:
Unfortunately, the same OpenGL Smoothing technique does not work
as easily with polygons (3D shapes). To do this properly you
must depth sort the polygons yourself, draw them in front-to-back order
with the correct blending settings. (See the Red Book for
details). However, modern graphics cards have antialiasing built
into their driver's by default. We can use this for polygons and
achieve good Antialiasing. The technique is known as Multisample
Antialiasing (MSAA), or Full Scene Antialiasing (FSAA).
You enable this through the Advanced section in the Display
Settings. Look under the Performance & Quality Settings,
there's an Antialiasing Setting. Enable antialiasing and set it
to the maximum value, for example 8xS.
Application Controlled basically means it's turned off. In
theory, one can turn this on, and control it, from their OpenGL code,
which would ideal for us. However, there is a bug in the Windows
version of Glut (v3.7) that prevents this from working. (You
cannot actually create the necessary pixel format. The window
creation fails and aborts immediately. From looking online, this
bug is not in the OSX version of glut.) One could use WGL for
creating their window instead of Glut, and then Application-Controlled
works. But then
you also have to use all of the Windows functions for callback
handling, mouse, keyboard, display, etc... Since Glut is well
documented in the Red Book, we'll stick with that.
For this to work, you must have Antialiasing enabled in the Display
Settings before creating your
OpenGL window with the command:
glutInitDisplayMode(GLUT_DOUBLE
| GLUT_RGBA | GLUT_DEPTH | GLUT_MULTISAMPLE);
The Steps:
- Enable Antialiasing and set to maximum level in the OpenGL driver
(Display Settings).
- Create an OpenGL window with Multisample support:
- glutInitDisplayMode(GLUT_DOUBLE
| GLUT_RGBA | GLUT_DEPTH | GLUT_MULTISAMPLE);
- Enable
multisampling and set glHint to nicest:
- glEnable(GL_MULTISAMPLE);
- glHint(GL_MULTISAMPLE_FILTER_HINT_NV, GL_NICEST);
- Optionally, test to see
if multisampling is working by querying the driver for the number of
samples used. If multisampling is enabled, you should have a
value greater than 0 for the GL_SAMPLE_BUFFERS and a number
corresponding to the driver settings for the GL_SAMPLES (ex. 8):
- GLint
iMultiSample = 0;
- GLint
iNumSamples = 0;
- glGetIntegerv(GL_SAMPLE_BUFFERS,
&iMultiSample);
- glGetIntegerv(GL_SAMPLES,
&iNumSamples);
Example Code, based on the Scene Antialiasing code in the Accumulation
Buffer section in the Red Book (accpersp.c):
Example Screenshots of OpenGL
Polygons (click on images for larger version):
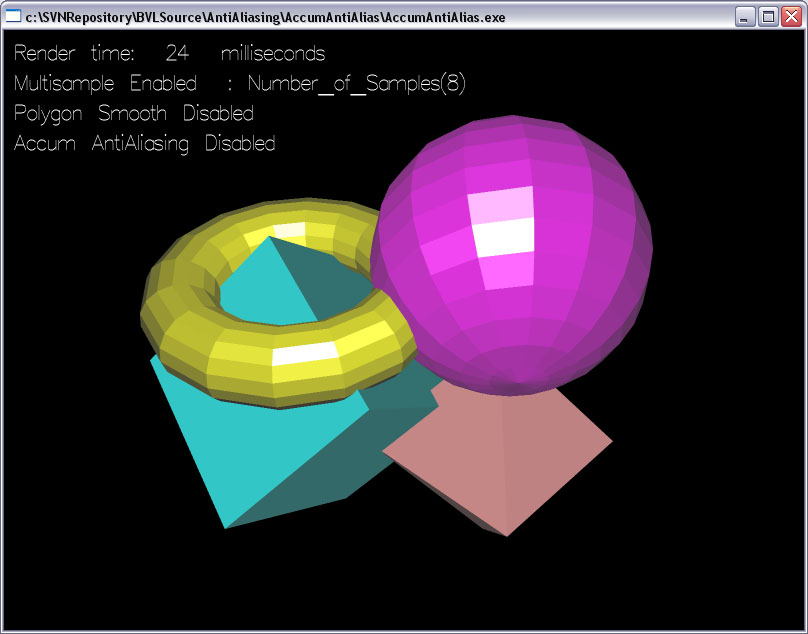
Shapes with No Antialiasing, No Multisampling:

Shapes with Polygon Smoothing. Notice how all edges are more
aliased than without smoothing:

Shapes with 2x Multisample Antialiasing:

Shapes with 8xS Multisample Antialiasing (what you want):

Antialiasing
with the Accumulation Buffer:
Prior to the inclusion of Multisample Antialiasing in the video
drivers, one would acheive Full Scene Antialiasing by using the
Accumulation Buffer. This is well documented in the Red Book and
works well. However, it is much
slower than using the functionality in the video driver.
Looking at the screenshots, I believe the Accumulation Buffer technique
gives you a better image, however, only slightly and at a significant
speed it and with greater complexity to your code. So I do not
believe the tradeoff is worth it, use the OpenGL Driver Antialiasing.
Shapes with Full Scene Antialiasing through the Accumulation Buffer:

Some Scene Antialiasing
timing tests, using the accpersp.c example
from the Accumulation Buffer in the Red Book:
Render one frame at fullscreen resolution of 1280 x 1024 @ 75Hz.
With Multisample Antialiasing turned off (Application-controlled) in
the display settings:
- No Accumulation Buffer Antialiasing = 13 ms
- Accumulation Buffer with 2 jitter samples (j2) = 53 ms
- Accumulation Buffer with 4 jitter samples (j4) = 93 ms
- Accumulation Buffer with 8 jitter samples (j8) = 173 ms
- Accumulation Buffer with 15 jitter samples (j15) = 306 ms
With Multisample Antialiasing Enabled in the NVidia Display Settings -
set to 8xS
AntiAliasing:
Hardware used in all of these tests:
- Dell Dimension 4600 (circa 2004) with an NVidia GeForce
FX 5200 graphics card.
- Screenshots taken at 800 x 600 @ 72Hz
Chris Burns - August 2006
cburns at berkeley dot edu